How to Stay Anonymous Online with a VPN

In today’s digital age, online privacy has become more important than ever. With the increasing number of cyber threats, data breaches, and government surveillance, staying anonymous online is no longer just an option—it’s a necessity for many users. One of the most effective tools to protect your online identity and maintain anonymity is a Virtual Private Network (VPN). Below, we’ll delve into how you can use a VPN to stay anonymous online, discussing its benefits, features to look for in a reliable VPN, and step-by-step instructions on setting it up.
Understanding Anonymity Online
Before diving into how a VPN helps maintain anonymity, let’s first understand what being anonymous online means.
Anonymity online refers to concealing your true identity while browsing the internet. This includes hiding your IP address, location, search history, and other personal information that could be used to identify you. Without proper measures, your Internet Service Provider (ISP), websites, advertisers, and even hackers can track your activities and collect sensitive data about you.
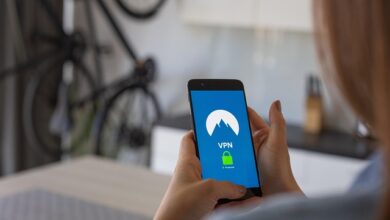
A VPN acts as a shield between you and the rest of the internet by encrypting your connection and routing your traffic through a secure server. This way, your real IP address remains hidden, making it difficult for anyone to trace your online activity back to you.
Why Use a VPN for Anonymity?
Here are some compelling reasons why using a VPN is essential for maintaining anonymity:
- Hide Your IP Address : A VPN assigns you a new IP address from one of its servers, masking your original IP and preventing others from knowing your exact location.
- Encrypt Your Data : All data transmitted through a VPN tunnel is encrypted, ensuring that no third party can intercept or read your communications.
- Bypass Geo-Restrictions : Access blocked content in certain regions without revealing your actual location.
- Protect Against Surveillance : Avoid mass surveillance by governments or ISPs by keeping your browsing habits private.
- Secure Public Wi-Fi Networks : When connected to public Wi-Fi networks, a VPN ensures that your data remains safe from potential eavesdroppers.
Choosing the Right VPN for Anonymity
Not all VPNs are created equal when it comes to ensuring anonymity. Here are key factors to consider when selecting a trustworthy VPN provider:
1. No-Logs Policy
- Ensure the VPN follows a strict “no-logs” policy, meaning they don’t store any records of your online activities. Some providers claim to have no-logs policies but may still log metadata such as timestamps or IP addresses. Always verify this through independent audits.
2. Strong Encryption
- Look for a VPN that uses robust encryption protocols like AES-256, which is considered military-grade security. Avoid outdated or weak encryption methods.
3. Wide Server Network
- A good VPN should offer a vast network of servers across multiple countries. This allows you to choose a server location that best suits your needs, whether it’s accessing region-restricted content or enhancing speed.
4. Kill Switch Feature
- In case your VPN connection drops unexpectedly, a kill switch will automatically disconnect your device from the internet to prevent exposing your real IP address.
5. Payment Privacy
- For maximum anonymity, opt for payment options that preserve your privacy, such as Bitcoin or prepaid gift cards. Avoid providing credit card details if possible.
Recommended Providers:
Some top-tier VPN services known for their commitment to user privacy include NordVPN, ExpressVPN, ProtonVPN, and Mullvad. Each offers unique features tailored to different user preferences.
Step-by-Step Guide to Setting Up a VPN for Anonymity
Once you’ve chosen a suitable VPN provider, follow these steps to set it up and start enjoying enhanced online privacy:
Step 1: Subscribe to a Reputable VPN Service
- Visit the official website of your selected VPN provider and sign up for a subscription plan. If available, take advantage of free trials or money-back guarantees to test the service before committing long-term.
Step 2: Download and Install the App
- Most reputable VPNs provide apps for various platforms, including Windows, macOS, Android, iOS, Linux, and routers. Simply download the app compatible with your device and install it following the on-screen instructions.
Step 3: Connect to a Server
- Launch the VPN application and log in with your credentials. Choose a server location based on your requirements—select a country where you want to appear to be located. For general anonymity, connecting to a server in a neutral country like Switzerland or Sweden might be ideal.
Step 4: Verify Connection Security
- Once connected, check your IP address using websites like WhatIsMyIP.com to confirm that your real IP is masked and replaced with the assigned one from the VPN server.
Step 5: Customize Settings for Enhanced Privacy
- Explore advanced settings within the app to enable features like the kill switch, split tunneling (if needed), and DNS leak protection. These settings further enhance your anonymity and security.
Additional Tips for Maximizing Anonymity
While a VPN significantly boosts your online privacy, combining it with other best practices can create an even stronger layer of protection:
- Use Secure Browsers : Opt for browsers like Tor or Brave, which prioritize privacy and block trackers by default.
- Enable Two-Factor Authentication (2FA) : Add an extra layer of security to your accounts to prevent unauthorized access.
- Avoid Phishing Scams : Be cautious of suspicious links or emails designed to steal your personal information.
- Regularly Update Software : Keep your operating system, antivirus software, and applications updated to patch vulnerabilities.
- Limit Social Media Sharing : Restrict the amount of personal information you share publicly on social media platforms.


